Performative walls
5-axis subtractive machining on planar surfaces
Subtractive machining is a digital fabrication process that consists of using digital data to manufacture physical prototypes with machines. The current work investigates subtractive machining of patterns on planar surfaces with an innovative and experimental approach and the goal is to achieve different visual effects for market-oriented applications such as wall paneling, therefore focusing on appealing designs of easy manufacture and reproduction. The method applied was to first generate toolpaths parametrically, then simulate using CAM softwares and finally fabricating prototypes with a 5-axis CNC machine.

Before starting to generate patterns, two studies were carried out in order to better understand the possibilities and constraints faced when milling with 5-axis and using solid surface: a manual experiment using stocks with similar densities as the target material and drills with different tool bits; and a 3-axis milling experiment with a 12mm Corian sheet at Medio Design. This allowed a greater perception of the material texture, dimensions and sound when milling.
A pattern is the repeated reproduction of elements until they form a design or composition. The main goal was to create patterns with optical illusions that interact with the viewer's perception.
The
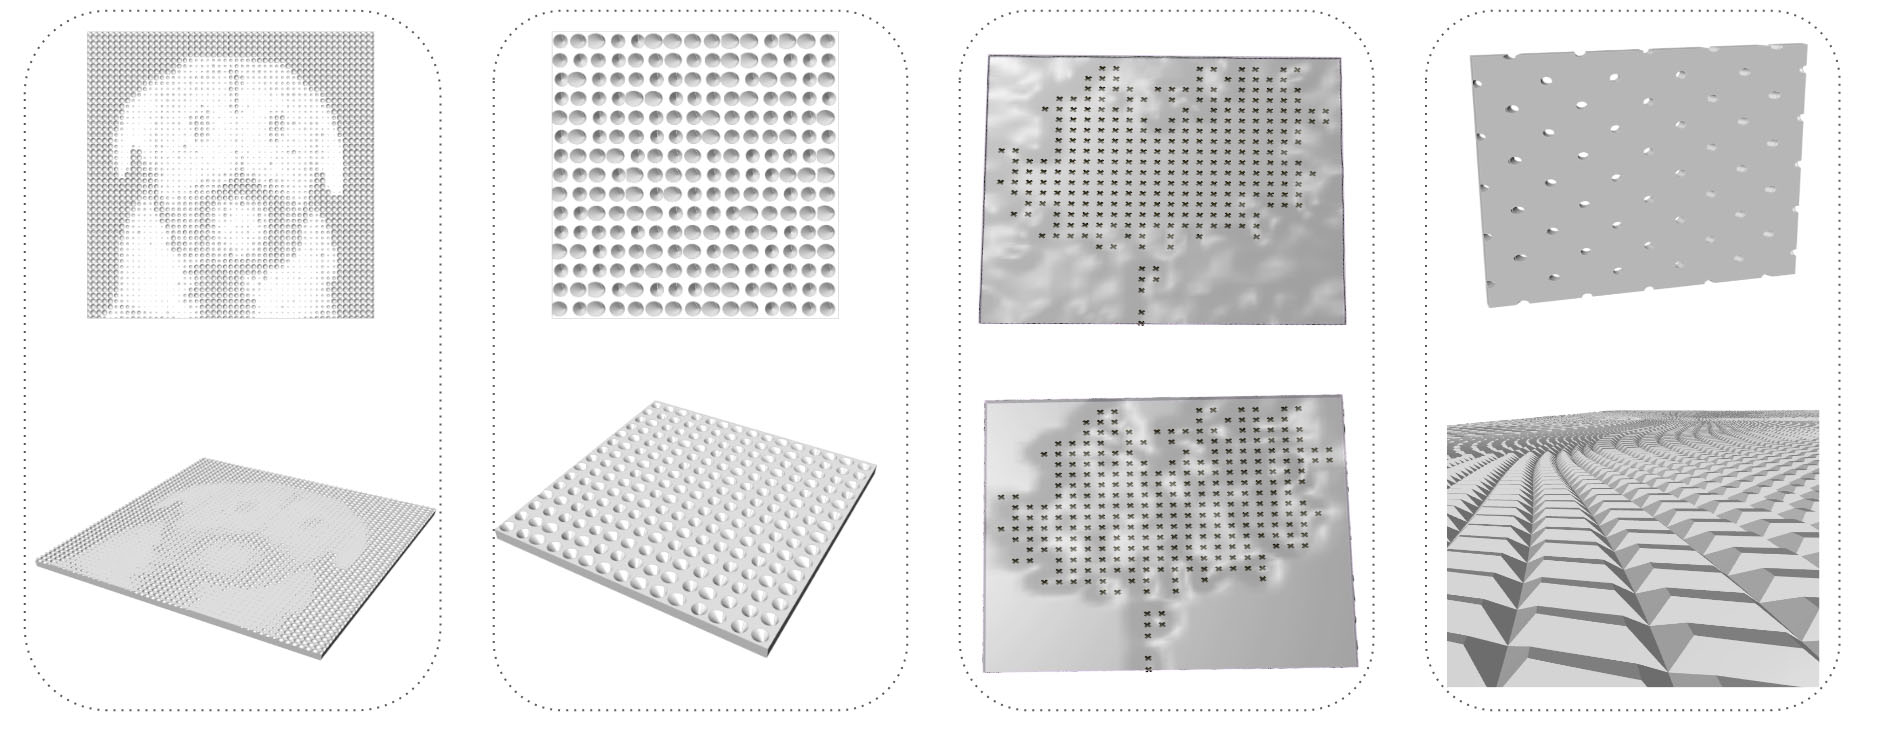
first patterning attempts were developed by reproducing images
provided by image sampler with different sized holes. However, these initial
strategies were left behind due to the increase in tool traveling time during
the milling process.
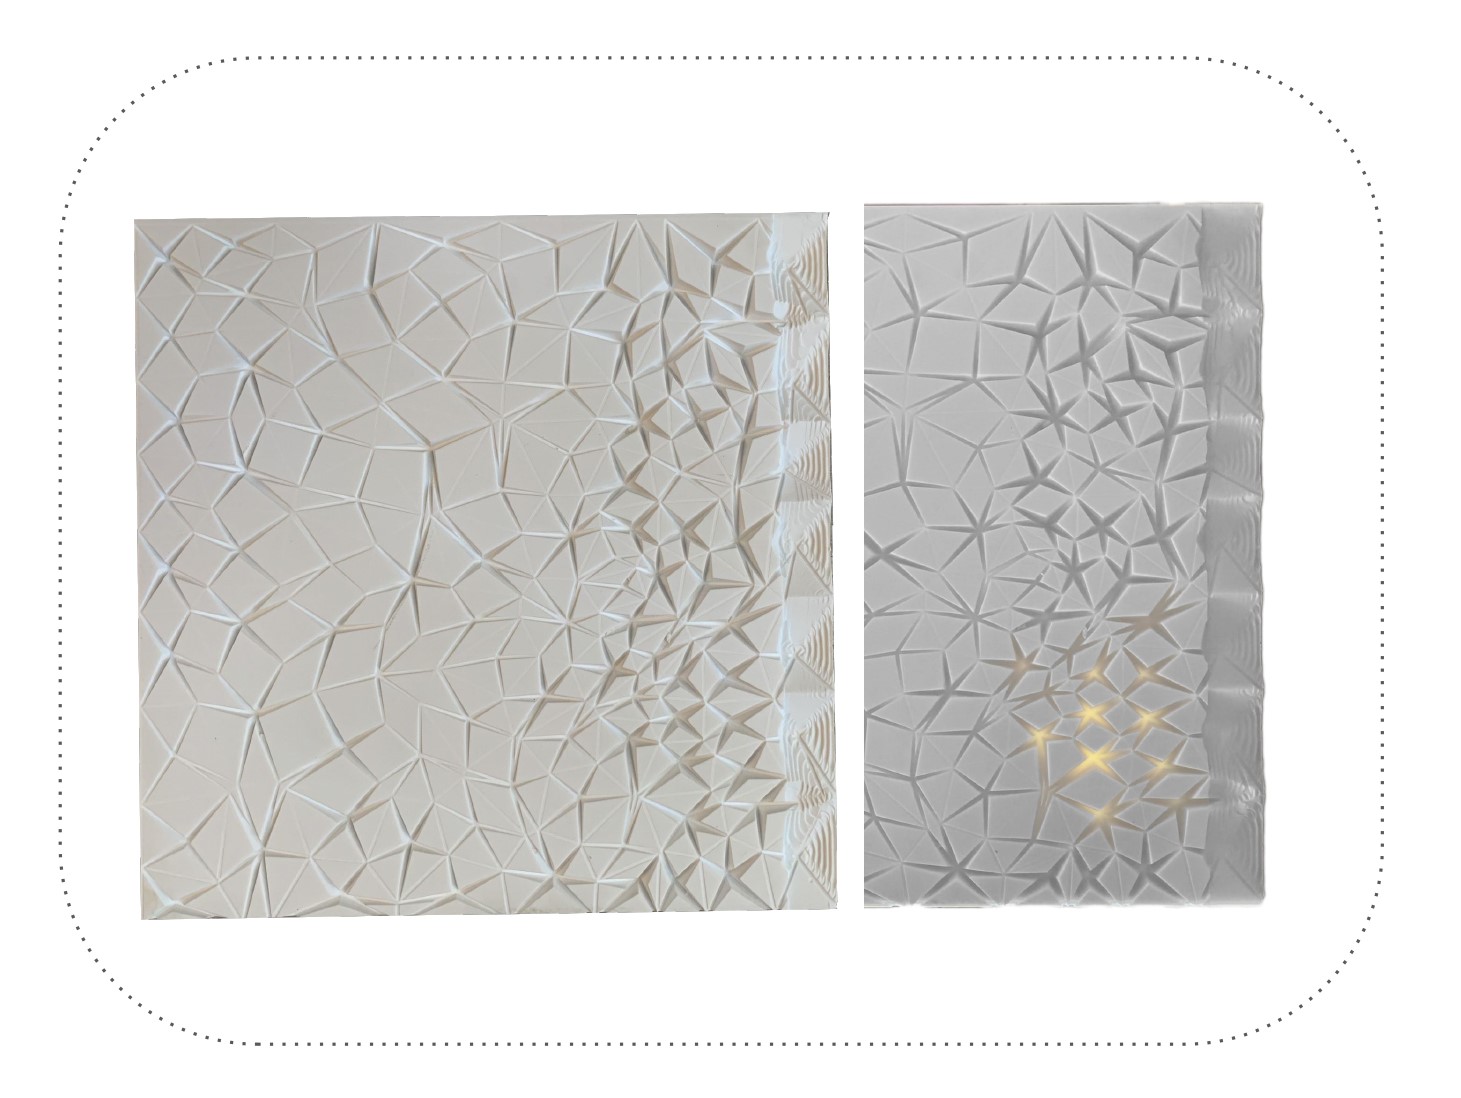
Shadow pattern
The objective of this pattern was to interact with light as a way of creating figurative shadows. By changing the light source location, distance and angle, the resulting images also change. It was applied the anamorphosis technique of geometrically projecting distorted images on a surface that can only be recognized from a specific point. In order to achieve such effect two different strategies were approached: first placing the light source perpendicularly to the panel normal to form a profile shadow and then placing it behind the plate.
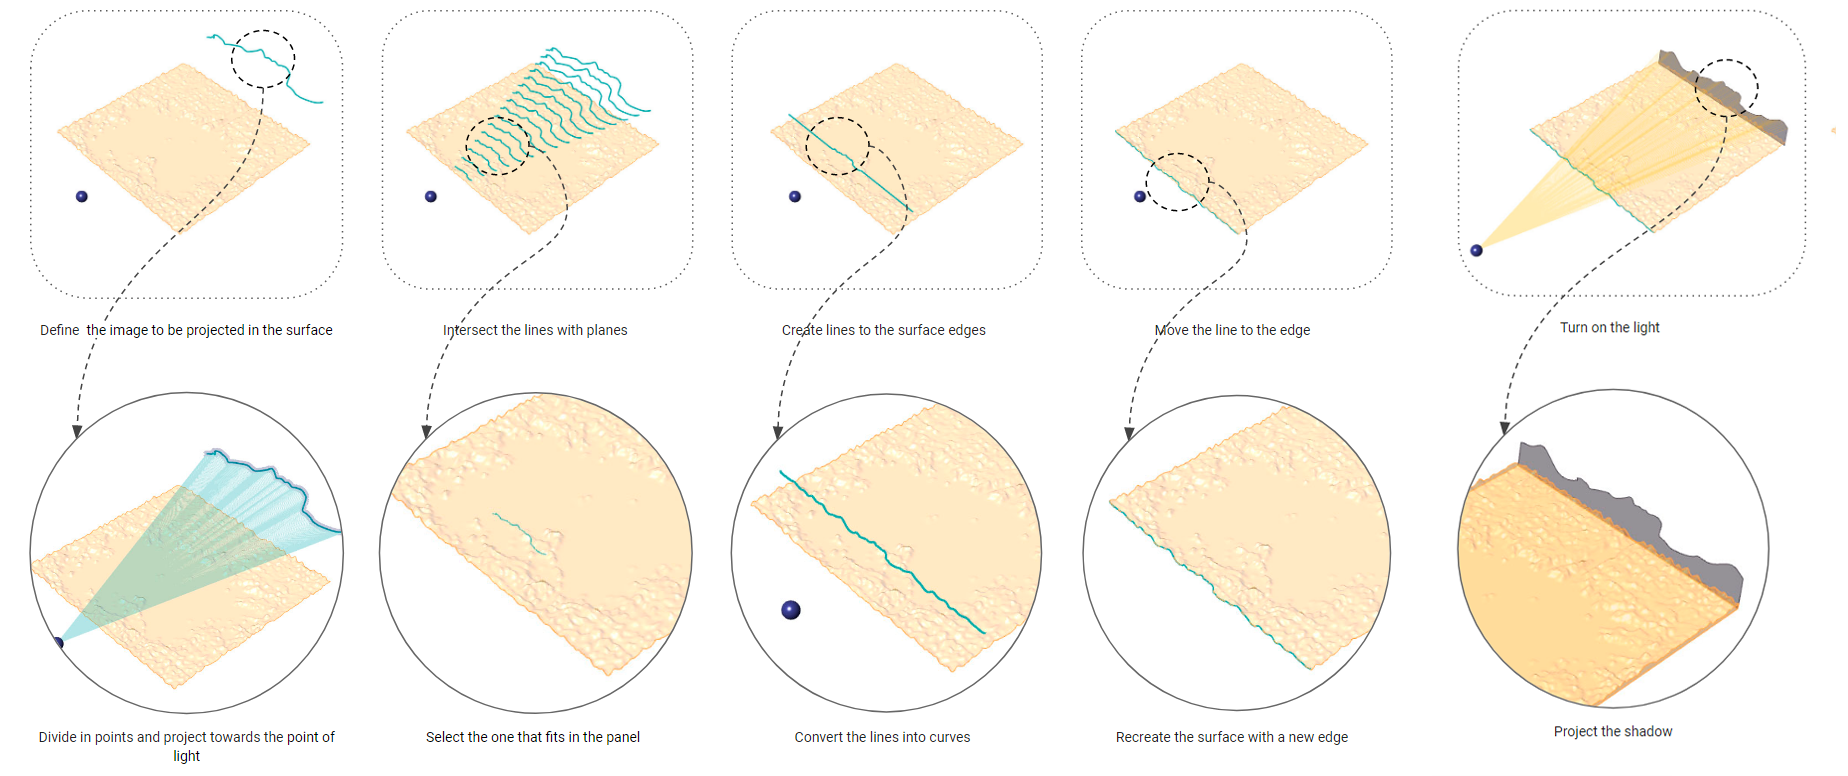
Method 1: Profile projection
For the development of this method, the point of light is located outside the panel, perpendicularly to the surface normal. Once its location has been defined, a curve with a figurative profile is placed on top the surface between the source of light and a second surface where the image will be projected, however closer to the edge where the light is, otherwise the shadow will not be well seen. The curve is divided into multiple points from which visual rays will be traced to the defined point of light. By extending these rays, they will intersect with the projecting surface. After obtaining the points of intersection and interpolating them, it results in the final shadow.
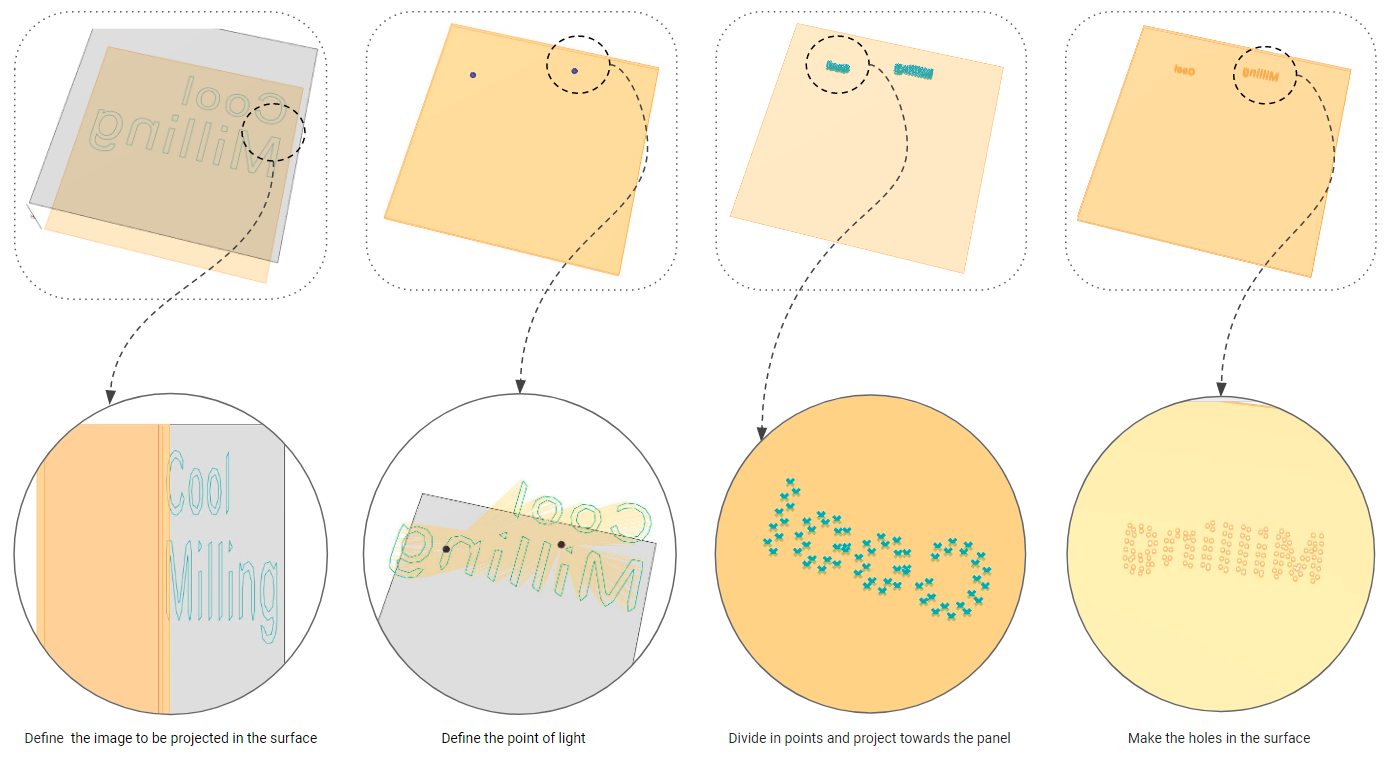
Method 2: Posterior projection
In the development of the second method, the point of light is behind the panel, and it was sought to generate the illusions in two different ways: the first one with the light passing through the material to project a reflection on an opposite surface, and the second one by playing with the material opacity when illuminated.
For the first form of intervention, once defined the point of light, the dimensions of the image and the surface where it will be developed, the image must be decomposed in points and projected towards the panel that will hold the illusion. This projection will result in a smaller and inverted version of the image. The distance between the panel to the projection surface is determined by the size of the final hole through which the light can pass, or vice versa, the greater the distance, the smaller the hole will be, therefore it must be taken into account at the time of the manufacturing process.
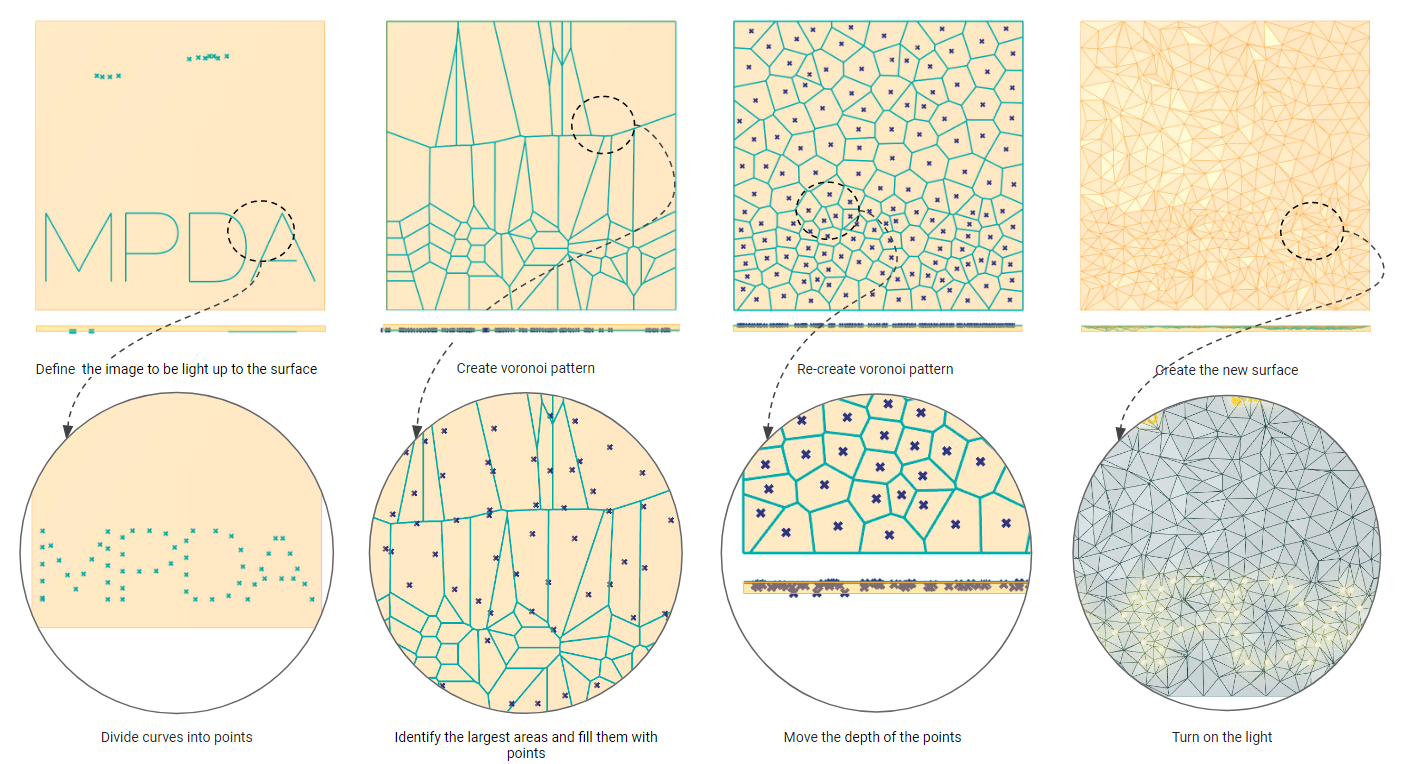
And for the second form of intervention it is necessary to take into account the maximal milling depth so the light can be appreciated and it is important that the driller does not exceed this distance enabling light to go through. The chosen image can be directly placed on the panel, decomposed into points, and these points are the ones that should have greater depth when milling so a light refraction can be seen.
Once the points are in place, a voronoi pattern is generated. The largest areas are identified, then filled with random points so a second voronoi pattern with more similar cell areas can be developed. Once the pattern is obtained, all point depths are modified varying in height. For the first intervention points, the height must be equal to the material width so it can be crossed by the tool bit.
In the second case, the image points depth must be less than a third of the width of the material so the light refraction can be seen and for the other points the height can oscillate between half the width of the material and the surface top to distract the observer. When the point heights have been established, pyramidal surfaces are generated, thus forming an interesting set of highs and lows on the panel.
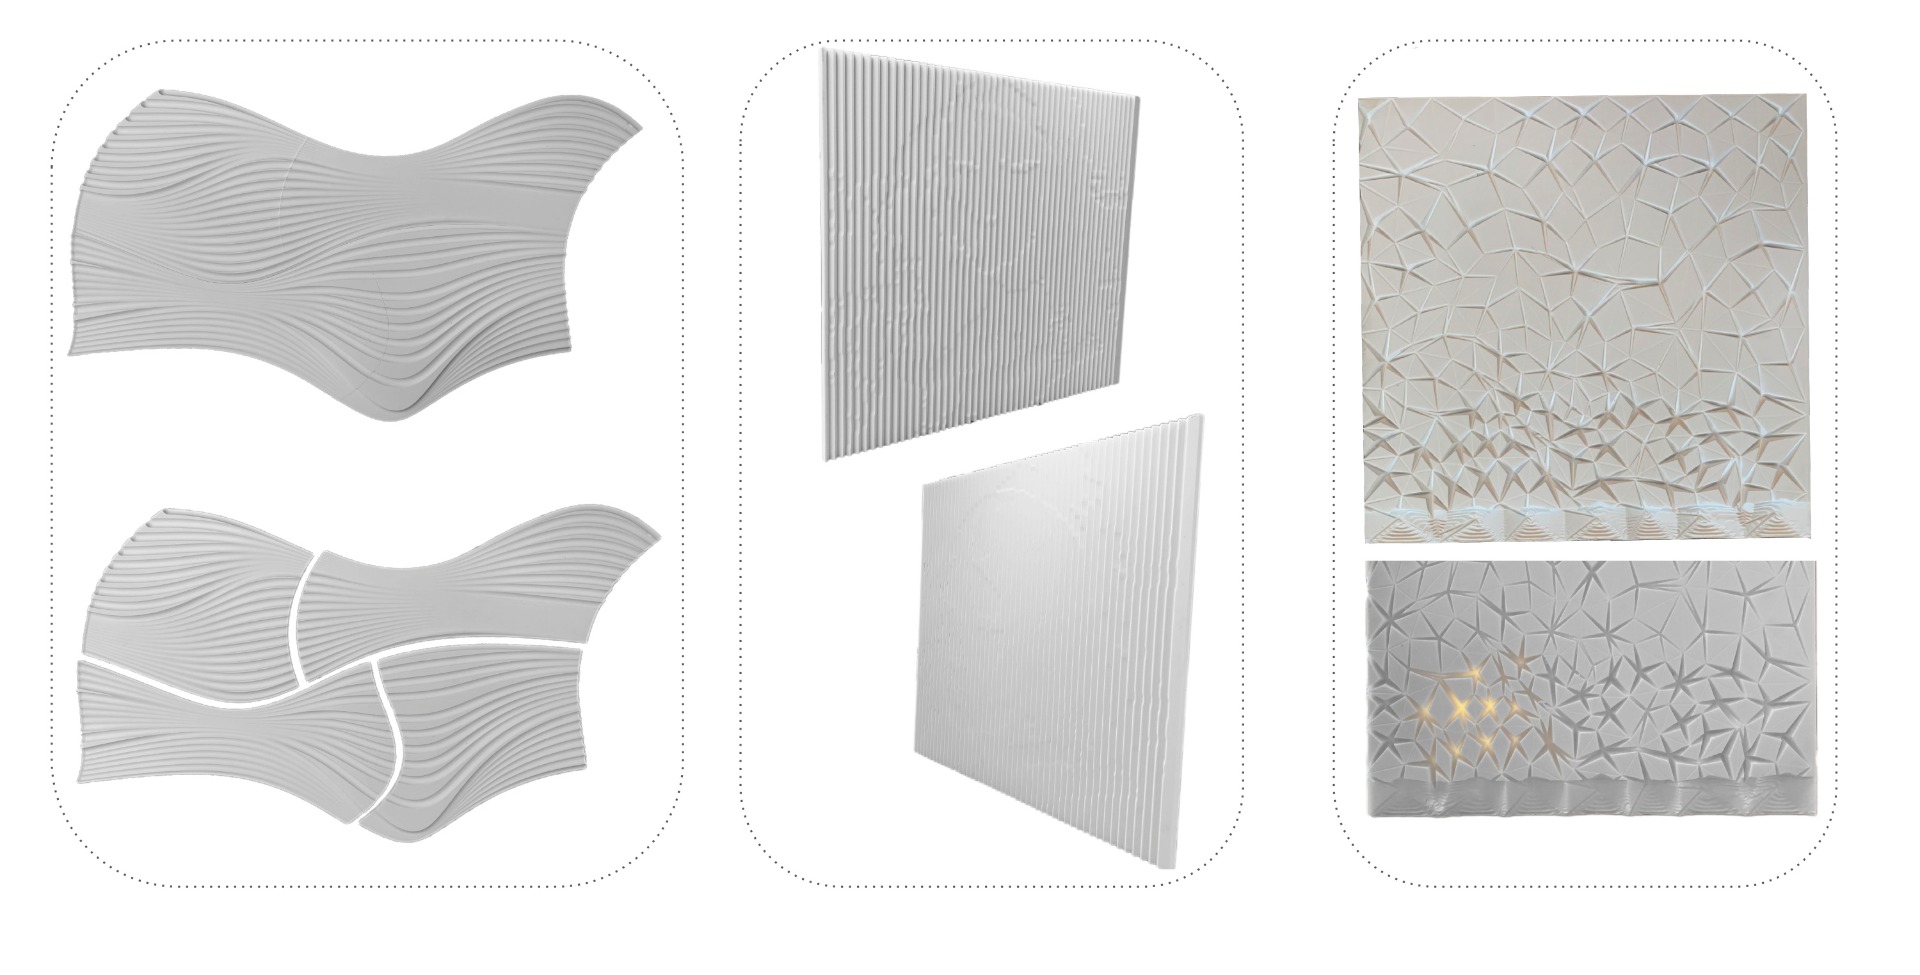
The prototyping process was carried out at Sumeplast, located on the outskirts of Barcelona, where the different designs explained above were tested. The biggest challenge at this stage was to translate the results obtained through RhinoCAM to the program with which the company works, TopSolid, however positive results were achieved.
This study was conceived in partnership with Sumeplast, Medio Design and CODA Office. We would like to thank Prof. Arch. Gerard Bertomeu, Prof. Arch. Enrique Soriano, Arch. Juan Pablo Quintero and Enrique Perotti for making this work possible.
This project was created in the framework of the Master Parametric Design in Architecture - Barcelona 2019
Team: Marina Brant - Camila Muñoz - Rudrapalsinh Solanki
